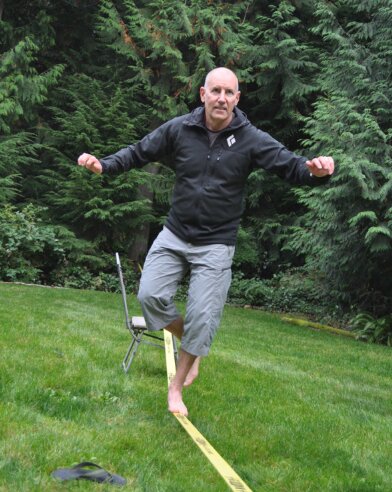
 Slacklining for snow sports
You see them while you are assessing a run a bit beyond your comfort level. They move like silk in the wind and send, with grace and elegance, the run you’re just hoping to survive. These athletes make difficult runs look easy, but they didn’t get there overnight.
To become proficient at the craft of snow sliding one has to execute a few things well. Fundamental to that proficiency is the ability to be balanced on one’s skis or snowboard. In the pursuit of better balance no activity may be more beneficial than slacklining. As a bonus, no balance drill may be as fun as slacklining.
Slacklining started in the glory days of Yosemite Valley’s Camp IV as a drill for big-wall climbers to hone their balance. Early practitioners used climbing rope or one-inch tubular webbing material. The narrow width and stretchy nature of the materials kept slacklining in the domain of the athletically gifted. In 2007, slacklines went mainstream as ratchet systems to tension lines were introduced and webbing materials and weaves were tailored to specific uses.
As skiers and snowboarders we tend to concentrate on muscular strength and endurance in the offseason. However, if you’re not balance training you are missing a huge opportunity to take your snow sliding to the next level.
When you hit the gym for a weight-lifting workout, your goal is not to lift more weight – it’s to get stronger. The increased weight is simply a measure of strength gained. Similarly, the goal of slacklining is not to walk on the slackline, but to improve balance. Walking the slackline is an end result that tells you your balance has improved.
To get started you first need a slackline and a way to set it at the correct height. Videos on YouTube are a great resource for this. Note that when properly tensioned, a slackline can exert over two tons of force on the object that it is attached to. Give this some thought before attaching your slackline to the deck posts on your house and ripping your deck down.
For snow sliders, the most fundamental drill in slacklining may be the most beneficial – the ability to balance on one foot. Start by standing next to your slackline and focus on a point well down it – maybe even beyond it. Bring one foot up on top of the slackline, and with your arms over your head (this might seem counterintuitive, but it helps with balance) and stand up. That first attempt might not last more than an instant, but by the end of your first session you should be able to hold a stance for a count of
several seconds.
Practice equally on each foot and aim for a count of 25 controlled seconds on one foot at a time. If you attain eight seconds on your left foot, keep trying on your left foot until you reach 25 seconds without falling. Then step to the other side of the slackline and practice stepping up and standing on the other foot. This will help build muscle memory.
Once you attain a count of 25 with control, it is time to transition to the other foot while on the slackline and begin walking. Remember that control is the key, and not controlled chaos. Your steps on the slackline should be like your turns on snow, flowing smoothly from one transition to the other – not an exercise in survival.
In the last several years slacklining has been widely embraced by elite athletes. Sochi Olympic gold medalist freestyle skier David Wise used slacklining as an integral part of his Olympic prep, and it is also part of American World Cup alpine ski racer Lindsey Vonn’s quiver of drills. For those of us with aspirations that stop closer to a great day outdoors, slacklining can help us unlock more pure pleasure from those days. x
Marty Grabijas is a PSIA certified alpine ski instructor and product developer in the
outdoor industry.